How To Move Azure Virtual Machines to Another Region

This article was written by June Castillote. He is a frequent contributor to the Adam the Automator (ATA) blog. If you'd like to read more from this author, check out his ATA author page. Be sure to also check out more how-to posts on cloud computing, system administration, IT, and DevOps on adamtheautomator.com!
Azure virtual machines (VMs) can be deployed to various Azure regions. In this tutorial, you're going to learn how to move Azure VMs to another region.
Prerequisites
This is a how-to article which means you can follow along with the examples. If you'll be doing so, below you'll find the basic requirements.
- An Azure subscription.
- An Azure account with proper role permissions.
- An Azure virtual machine you intend to move.
Article Deliverables
In the next sections, you will learn, in Azure, how to move a VM to another region. You will learn how to prepare an Azure virtual machine to move, and what considerations you must plan for. You will also learn how to create and utilize an Azure Recovery Services vault to enable replication and synchronization of resources between the source and destination regions.
You will also learn how invoke an actual failover and the tasks that you need to perform to verify whether the failover is successful. And lastly, you'll see how to clean up the leftover resources to avoid running charges for resources that will no longer be used.
Warning: Moving a virtual machine to another Azure region only mirrors the storage, network interface, virtual network, and the virtual machine itself.
It is up to you to recreate any other resources that may be needed by the virtual machine in its new location. These resources may include public IP addresses and network security groups.*
Let's dive in!
Preparing for the Azure VM Region Move
“Give me six hours to chop down a tree and I will spend the first four sharpening the ax.” - Abraham Lincoln
Whether a VM move is a reaction to an emergency situation or a scheduled move, careful planning and consideration should always come with it.
Before you begin the move, consider the following:
- Region support - In Azure, there are Geographic Clusters. Inside these geographic clusters are the groups of Azure regions. Azure virtual machines can only be moved between regions that are inside the same cluster.
- Components - Orchestrating the VM move in Azure already gives the option to automatically create the target resources in the destination region. But, it is still good to have an understanding of which components will be involved.
- Downtime - Decide if you need to communicate a possible projected downtime when moving virtual machines. Interruption usually takes 8-10 minutes while the failover is happening. But it is recommended to give it some buffer time to allow for possible issues and post-failover tasks.
Depending on your organization's rules or support structure, you may have a lot more considerations.
Confirming the Azure VM to Move
Before you can move a virtual machine, you must ensure that a suitable virtual machine is available first. Take note of which region the virtual machine currently located, and decide the region where it will be moved to.
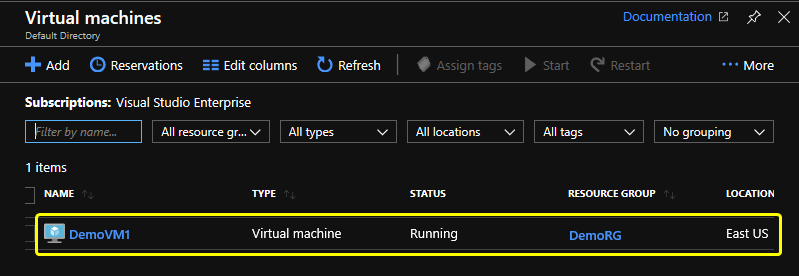
From the Azure Portal, go to Virtual machines. As you can see in the screenshot below, in my subscription, there is one virtual machine named DemoVM1 belonging to the DemoRG resource group and located in the East US region. The plan is to move this VM to the West US region.
Creating an Azure Recovery Services Vault
When you move an Azure virtual machine from one region to another, remember that you are essentially moving data across regions. The Azure Recovery Services Vault is an Azure service that hosts that data being replicated from the source to the destination.
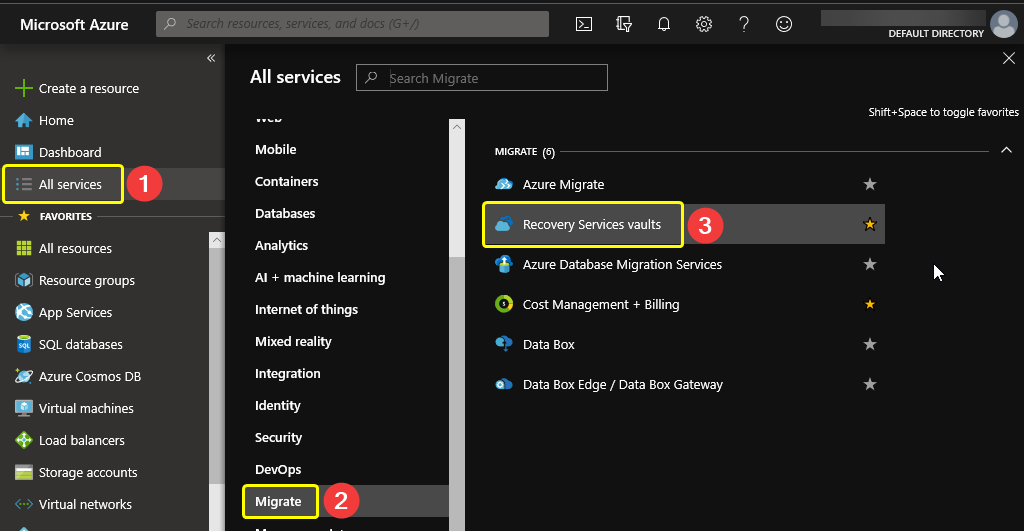
To create an Azure Recovery Services Vault, first, go to (1) All Services —> (2) Migrate and select (3) Recovery Services as shown below.
Once inside the Recovery Service Vault page, click on Add as below.

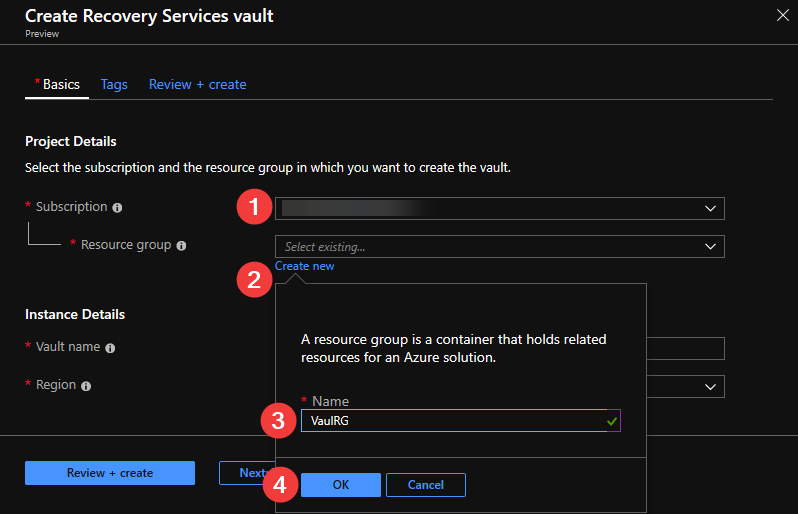
In the Create Recovery Services vault page, select the (1) Subscription, click (2) Create new and type in the (3) Name field calling it VaultRG and click on (4) OK as shown below.
Note that the vault does not have to be called VaultRG. Feel free to use your own name.
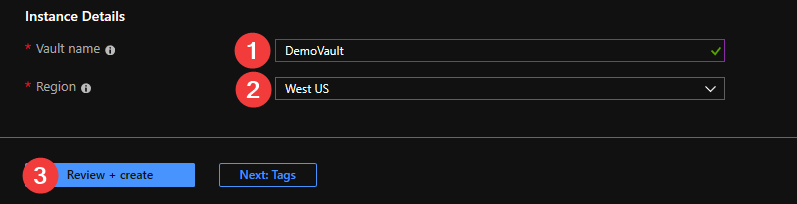
Type in the name DemoVault in the (1) Vault name box. And select the (2) Region where you will create this resource. Then click on (3) Review + create.
The selected region must be in the same geographic cluster of the current region of the virtual machine that you plan to move.
On the Summary page, click Create to start the resource deployment process.

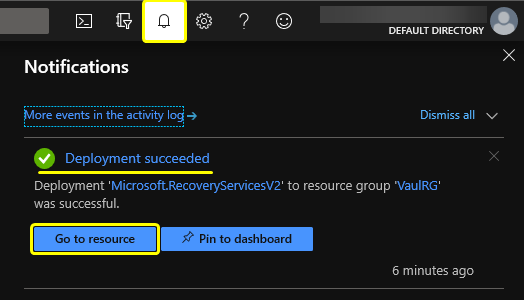
Now wait for the deployment to complete. The deployment process usually takes 5-10 minutes. Then click on the Go to resource button as shown below.
Enabling and Starting the Replication
Now that the DemoVault is created, enable and start the replication of your virtual machine. Follow these instructions below to enable replication.
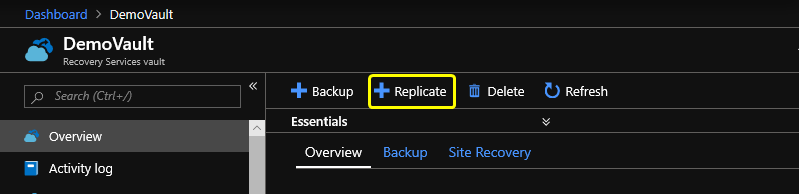
In the DemoVault page, click on the Replicate button as shown below.
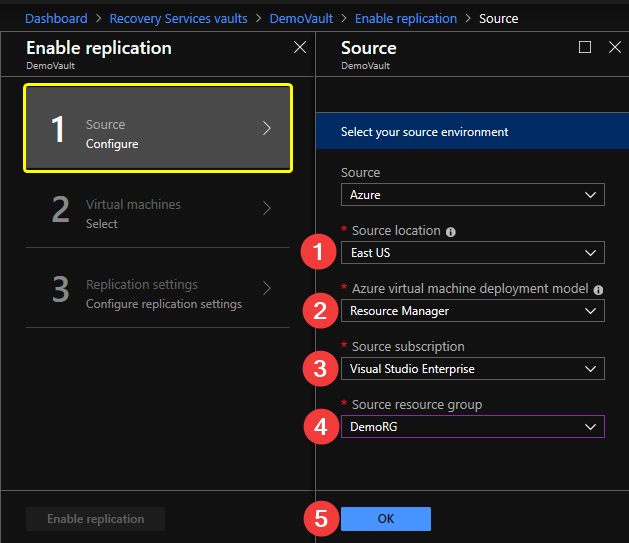
In the Source Configuration, select the (1) source location and leave the default deployment model as (2) Resource Manager.
Next, select the (3) source subscription. Select the (4) Source resource group where the virtual machine belongs to. Then click (5) OK.
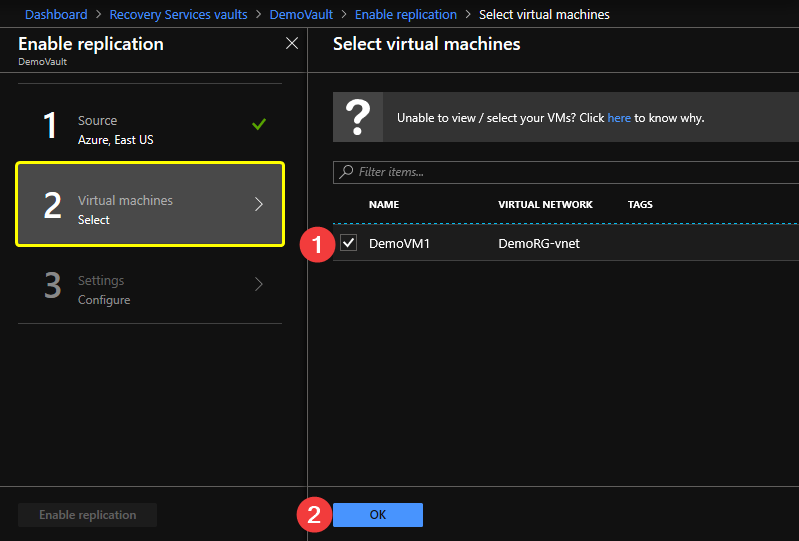
Now you are presented with the list of the virtual machines belonging to the resource group you selected as the source. Select the (1) Name of the virtual machine you plan to move, then click (2) OK.
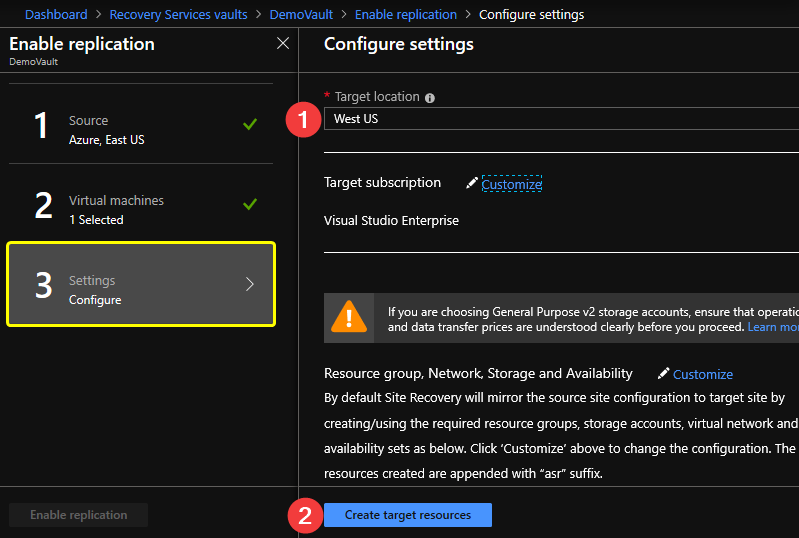
In the Configure Settings section, select the (1) Target location which is the region where you plan to move your virtual machine. Then click (2) Create target resources.
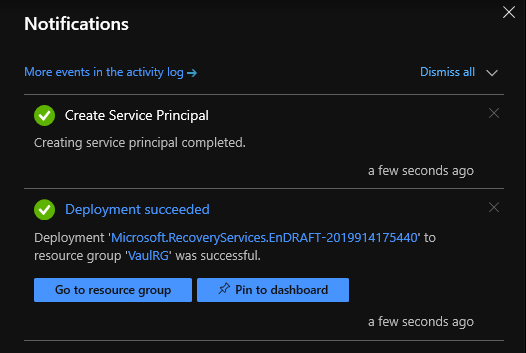
Creating target resources may take several minutes. When the process has finished, you should see a similar status notification as shown in the screenshot below.
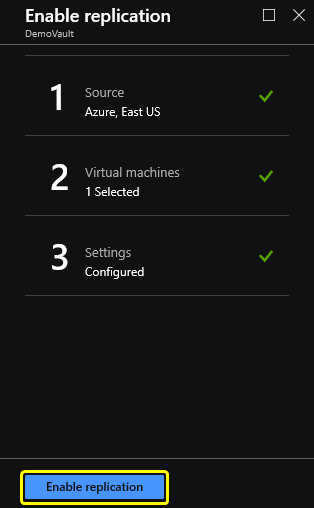
Once the target resources are deployed successfully, click on the Enable replication button to begin replication.
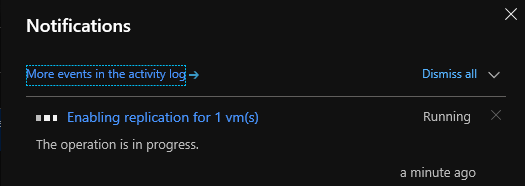
The process of enabling replication could take several minutes to complete.
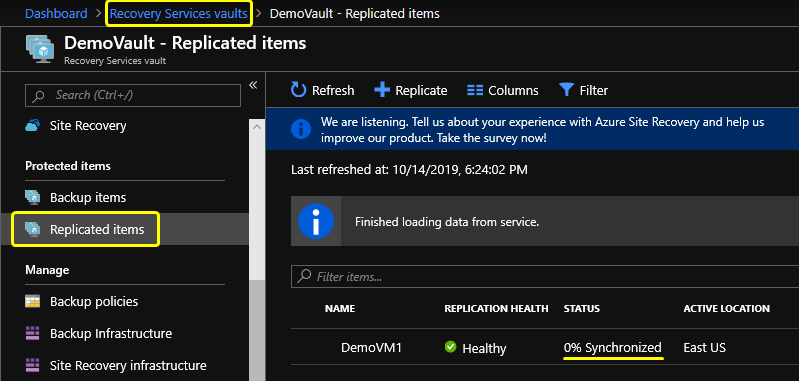
To monitor the status of synchronization, go back to Recovery Services vaults and click on Replicated items. You should see the status of the replication health and synchronization progress. You can see in the screenshot below that the synchronization has started and the progress is at 0%.
At this point, wait for synchronization to finish. How long the synchronization takes depends on the size of data being synchronized. On a vanilla Window Server 2019, it took 15 minutes to finish the synchronization.
As you can see in the screenshot below, the status has changed to Protected which means that the replication has been completed.

Moving the Azure VM to a Region
Once synchronization is complete, the VM is ready to be moved to its new region.
- To initiate the VM migration, go back to the Recovery Service vaults > DemoVault > Replicated Items. Then select the name of the virtual machine from the list.
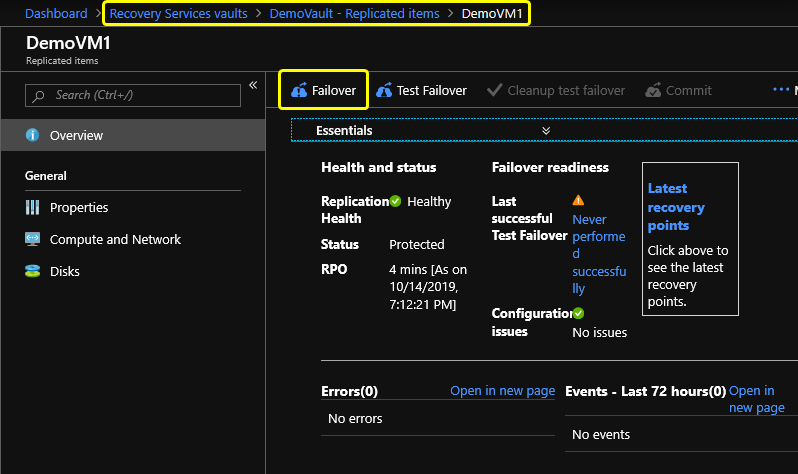
- You should be taken to the VM page similar to the screenshot below.
- Now click on the Failover button.
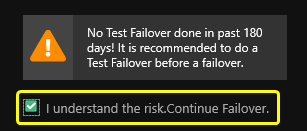
Since this is the first time you are doing a failover for this particular machine, expect to see a warning displayed on the right side of the Azure portal page. The warning is similar to the one shown in the screenshot below. You must put a check on 'I understand the risk. Continue failover' checkbox.
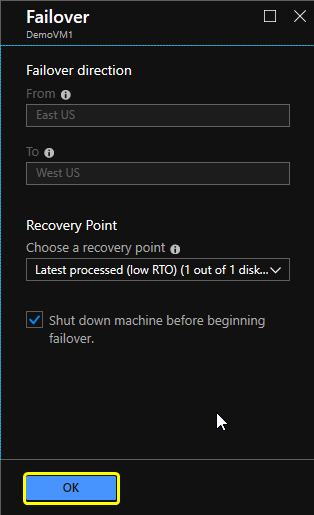
4. You will be presented with failover options. Leave the default settings then click OK.
Recovery Services will attempt to shut down the virtual machine. Even if the shutdown fails, the failover will continue.
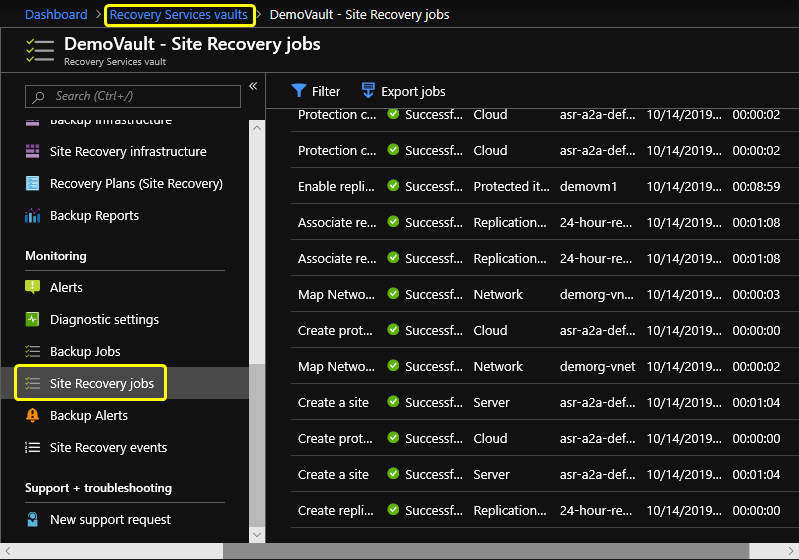
Monitor the failover progress by going back to Recovery Services Vaults > Site Recovery jobs. There you will see the status of failover and the results. The below screenshot is what you'd expect to see if the failover is successful.
Confirming the Move Results
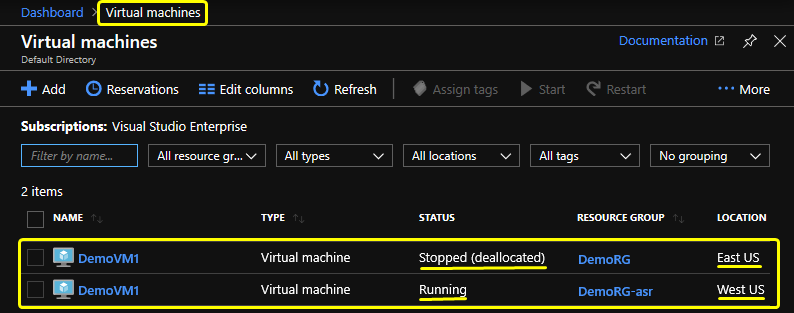
At this point, the Azure virtual machine should have been moved from the East US Region to the West US Region. To confirm, go to the Virtual machines page to inspect the list of virtual machines.
The screenshot below shows that the status of the virtual machine in the source region East US is Stopped (deallocated), and the status of the virtual machine located in the destination region West US is Running. This confirms that the VM migration was successful!
Cleaning Up Leftovers
At this point, you should have finished moving the virtual machine to its new region. But, to avoid being charged further, there are two things you must remember to do post-migration - disable replication and clean up leftover resources.
Disabling Replication
After accomplishing the virtual machine migration, you should go back and disable the replication.
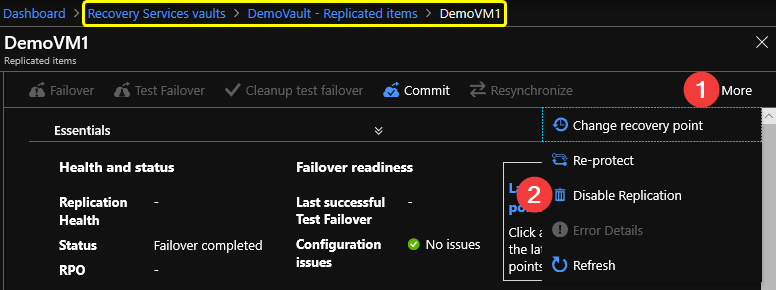
Go to Recovery Services vaults --> DemoVault --> Replicated Items and select the replicated virtual machine name from the list. Then click the (1) More button, and select (2) Disable Replication.
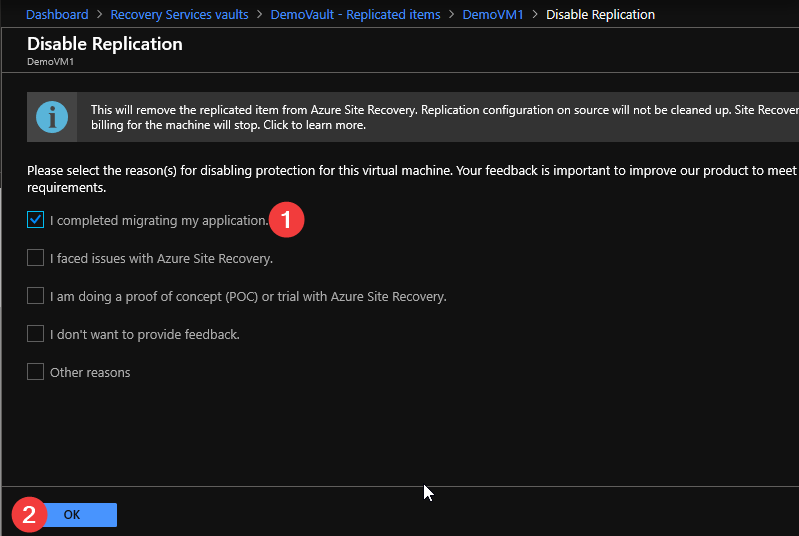
You will then be asked to select the reason or reasons for disabling replication. Select (1) I completed migrating my application, then click (2) OK.
Deleting the Leftover Resources
If you do not plan to reuse the original virtual machine and its associated resources (network, storage), you can delete them from Azure. This stops them from incurring any more consumption that would appear in your billing.
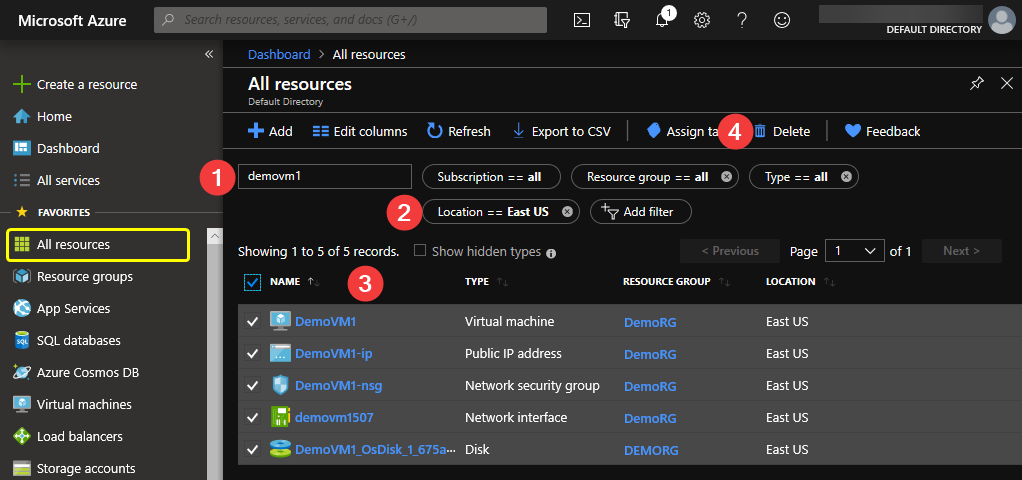
Go to All resources, in the (1) filter by name field, type the name of the virtual machine. Next, (2) filter by location and choose the source region name. Once the list is filtered, inspect the list of resources and select the (3) resources to delete, then click on Delete
CAUTION: The resources associated with the virtual machine could be different from the ones shown in the screenshot below. It is up to you to determine which resources to remove.
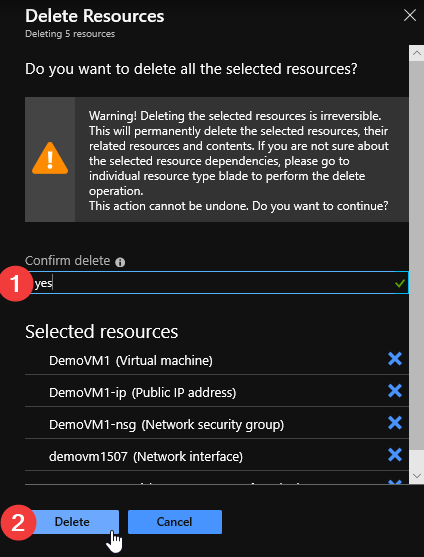
Next, you will be asked to confirm the deletion. Type yes in the (1) Confirm delete box, then click (2) Delete.
Summary
In this article, you learned the different basic considerations to take when planning an Azure virtual machine move to another region. At this point, you should know how to create the recovery vault, enable replication and synchronize data from one region to another.
You have also learned how to invoke the virtual machine failover, how to monitor its progress and how to confirm whether the migration is successful. Additionally, you now know to ensure that the leftover resources do not incur any more billing charges after the virtual machine has been migrated.